絡教育-教育培訓--江蘇教育黃頁")
惠多多")

統(tǒng)免費下")
本文探討了MySQL主從復制的工作原理,包括Master和Slave之間的IO線程和SQL線程。主從同步是異步過程,Master通過IO線程請求 slave,slave通過IO線程接收 master 的bin-log日志,最后mast...

本文用docker的方式做MySQL主從試驗,方便理解原理,生產(chǎn)環(huán)境不建議使用docker部署數(shù)據(jù)庫。
MySQL主從復制的用途:確保數(shù)據(jù)安全,做數(shù)據(jù)的熱備,作為后備數(shù)據(jù)庫,主數(shù)據(jù)庫服務器故障后,可切換到從數(shù)據(jù)庫繼續(xù)工作,避免數(shù)據(jù)的丟失。
MySQL主從復制的工作原理:MySQL主從數(shù)據(jù)同步是一個異步復制的過程,要實現(xiàn)復制首先需要在master上開啟bin-log日志功能,bin-log日志用于記錄在Master庫中執(zhí)行的增、刪、修改、更新操作的sql語句。整個過程需要開啟3個線程,分別是Master開啟IO線程,Slave開啟IO線程和SQL線程,
具體主從同步原理詳解如下:(也可以跳過這段廢話)qSlave上執(zhí)行slave start,Slave IO線程會通過在Master創(chuàng)建的授權用戶連接上至Master,并請求master從指定的文件和位置之后發(fā)送bin-log日志內容;qMaster接收到來自slave IO線程的請求后,master IO線程根據(jù)slave發(fā)送的指定bin-log日志position點之后的內容,然后返回給slave的IO線程。q返回的信息中除了bin-log日志內容外,還有master最新的binlog文件名以及在binlog中的下一個指定更新position點;qSlave IO線程接收到信息后,將接收到的日志內容依次添加到Slave端的relay-log文件的最末端,并將讀取到的Master端的 bin-log的文件名和position點記錄到master.info文件中,以便在下一次讀取的時候能告知master從響應的bin-log文件名及最后一個position點開始發(fā)起請求;qSlave Sql線程檢測到relay-log中內容有更新,會立刻解析relay-log的內容成在Master真實執(zhí)行時候的那些可執(zhí)行的SQL語句,將解析的SQL語句并在Slave里執(zhí)行,執(zhí)行成功后,Master庫與Slave庫保持數(shù)據(jù)一致。
MySQL主從復制實施注意事項:主從服務器操作系統(tǒng)版本和位數(shù)一致;Master 和 Slave 數(shù)據(jù)庫的版本要一致;Master 和 Slave 數(shù)據(jù)庫中的數(shù)據(jù)要一致;Master 開啟二進制日志,Master 和 Slave 的 server_id 在局域網(wǎng)內必須唯一。
MySQL主從復制結構圖:
MySQL主從復制實戰(zhàn):
由于我電腦硬件配置低,無法跑2個虛擬機,本實驗用docker容器的方法:
環(huán)境搭建:docker pull mysql8.0鏡像:
docker pull mysql:8.0
docker run --name master -p8888:3306 -e MYSQL_ROOT_PASSWORD=123456 -d mysql:8.0
分別測試登陸master和slave
mysql -u root -p123456 -P 8888 -h 127.0.0.1
mysql -u root -p123456 -P 9999 -h 127.0.0.1
復制容器里的my.cnf文件到宿主機當前位置:
docker cp master:/etc/my.cnf ./
在my.cnf文件中[mysqld]段中加入如下代碼,cp回master容器原位置,重啟MYSQL服務:server-id = 1 log-bin = mysql-bin
登錄master數(shù)據(jù)庫,創(chuàng)建tongbu用戶及密碼并設置權限,執(zhí)行如下命令,查看bin-log文件及position點:
CREATE USER 'tongbu'@'%' IDENTIFIED WITH mysql_native_password BY '123456';GRANT REPLICATION SLAVE ON *.* TO 'tongbu'@'%';show master status;
修改my.cnf文件,在[mysqld]段中加入如下代碼,cp回slave容器原位置,重啟MYSQL服務:server-id = 2
Slave指定Master IP、用戶名、密碼、bin-log文件名( binlog.000003)及position(656),代碼如下:這里重點注意,因為是用容器做的實驗環(huán)境,要注意以下參數(shù)master_host='192.168.101.6',master_port=8888
change master to master_host='192.168.101.6',master_port=8888,master_user='tongbu',master_password='123456',master_log_file='mysql-bin.000004',master_log_pos=157;
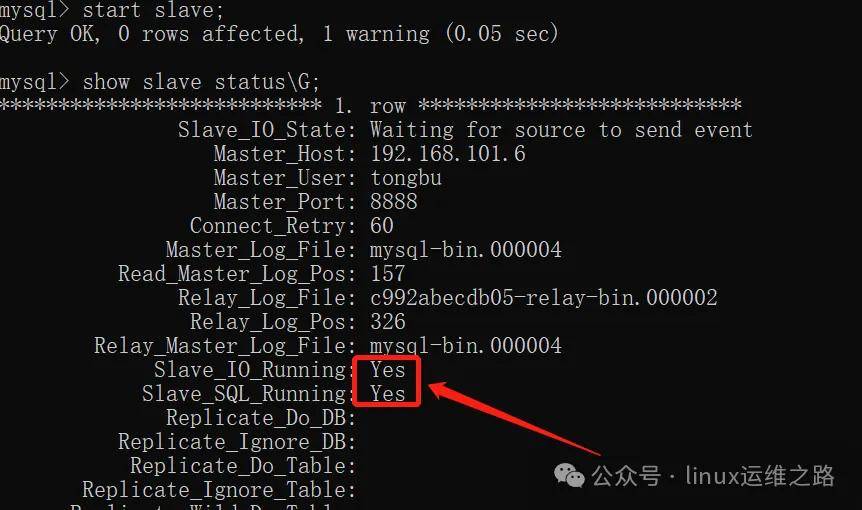
在slave啟動slave start,并執(zhí)行show slave status\G查看Mysql主從狀態(tài):show slave status\G;
#后面要加\G,則看起來很亂。
#要確保以下兩個地方顯示是Yes,如果不是Yes,需要檢查前面的步驟是否有錯誤的地方;
Slave_IO_Running: Yes
Slave_SQL_Running: Yes
#如果顯示Slave_IO_Running:Connecting 的問題,要從以下幾點查找:
#網(wǎng)絡不通、防火墻端口未開放、mysql賬戶密碼錯誤、mysql主從機配置文件寫錯、配置從機連接語法錯誤、主機未開放賬戶連接權限;
#例如本次實驗因為沒注意容器的問題,master_host='192.168.101.6',寫成了127.0.0.1導致一直無法連接。
測試在master上創(chuàng)建一個數(shù)據(jù)庫:
mysql> show databases;
+--------------------+
| Database |
+--------------------+
| information_schema |
| mysql |
| performance_schema |
| sys |
+--------------------+
4 rows in set (0.00 sec)
mysql> create database test_db;
Query OK, 1 row affected (0.03 sec)
mysql> show databases;
+--------------------+
| Database |
+--------------------+
| information_schema |
| mysql |
| performance_schema |
| sys |
| test_db |
+--------------------+
5 rows in set (0.00 sec)
在slave上查看是否同步過來:
mysql> show databases;
+--------------------+
| Database |
+--------------------+
| information_schema |
| mysql |
| performance_schema |
| sys |
| test_db |
+--------------------+
5 rows in set (0.00 sec)
mysql>
可以看到,測試增加的test_db已經(jīng)自動同步過來,主從復制實驗完成。
再做個試驗:構建MySQL主主復制,實現(xiàn)在主庫操作增刪改,從庫能夠同步,在從庫操作增刪改,主庫也能同步數(shù)據(jù)。MySQL主主復制是指兩臺機器(master和slave)互為主從。
搭建MySQL主主復制環(huán)境:啟動兩個MySQL8.0容器,name分別為node001(端口3333),node002(端口4444):
docker run --name node001 -p3333:3306 -e MYSQL_ROOT_PASSWORD=123456 -d mysql:8.0
docker run --name node002 -p4444:3306 -e MYSQL_ROOT_PASSWORD=123456 -d mysql:8.0
利用docker cp node001/node002:/etc/my.cnf,復制出my.cnf配置文件并修改后利用docker cp my.cnf node001/node002:/etc/傳回容器內部,修改如下:
在node001的[mysqld]字段上添加
server-id = 1
log_bin = mysql-bin
在node002的[mysqld]字段上添加
server-id = 2
log_bin = mysql-bin
重啟兩個容器(達到重啟mysql服務的作用):
docker restart node001 node002
node001
node002
在node001上添加用戶并授權:
CREATE USER 'tongbu'@'%' IDENTIFIED WITH mysql_native_password BY '123456';
GRANT REPLICATION SLAVE ON *.* TO 'tongbu'@'%';
在node002上添加用戶并授權:
CREATE USER 'tongbu'@'%' IDENTIFIED WITH mysql_native_password BY '123456';
GRANT REPLICATION SLAVE ON *.* TO 'tongbu'@'%';
在node001要查看master信息:
mysql> show master status\G;
*************************** 1. row ***************************
File: mysql-bin.000001
Position: 656
Binlog_Do_DB:
Binlog_Ignore_DB:
Executed_Gtid_Set:
1 row in set (0.01 sec)
ERROR:
No query specified
mysql>
在node002上設置從節(jié)點,進行以下操作,注意master_log_file='mysql-bin.000001',master_log_pos=656;要與上一步查看到的node001信息一致:最后執(zhí)行 start slave;
change master to
master_host='192.168.101.6',master_port=3333,master_user='tongbu',master_password='123456',master_log_file='mysql-bin.000001',master_log_pos=656;
start slave;
查看node002的slave狀態(tài)(確保標紅處的兩個Yes):
show slave status \G
mysql> show slave status \G
*************************** 1. row ***************************
Slave_IO_State: Waiting for source to send event
Master_Host: 192.168.101.6
Master_User: tongbu
Master_Port: 3333
Connect_Retry: 60
Master_Log_File: mysql-bin.000001
Read_Master_Log_Pos: 656
Relay_Log_File: 914fdc4fdb40-relay-bin.000002
Relay_Log_Pos: 326
Relay_Master_Log_File: mysql-bin.000001
Slave_IO_Running: Yes
Slave_SQL_Running: Yes
在node002要查看master信息:
mysql> show master status\G;
*************************** 1. row ***************************
File: mysql-bin.000001
Position: 656
Binlog_Do_DB:
Binlog_Ignore_DB:
Executed_Gtid_Set:
1 row in set (0.00 sec)
ERROR:
No query specified
mysql>
在node001上設置從節(jié)點,進行以下操作,注意master_log_file='mysql-bin.000001',master_log_pos=656;要與上一步查看到的node001信息一致:最后執(zhí)行 start slave;
change master to
master_host='192.168.101.6',master_port=4444,master_user='tongbu',master_password='123456',master_log_file='mysql-bin.000001',master_log_pos=656;
start slave;
查看node001的slave狀態(tài)(確保標紅處的兩個Yes):
mysql> show slave status\G;
*************************** 1. row ***************************
Slave_IO_State: Waiting for source to send event
Master_Host: 192.168.101.6
Master_User: tongbu
Master_Port: 4444
Connect_Retry: 60
Master_Log_File: mysql-bin.000001
Read_Master_Log_Pos: 656
Relay_Log_File: f061023a72b4-relay-bin.000002
Relay_Log_Pos: 326
Relay_Master_Log_File: mysql-bin.000001
Slave_IO_Running: Yes
Slave_SQL_Running: Yes
測試node001增加一個test數(shù)據(jù)庫:
mysql> show databases;
+--------------------+
| Database |
+--------------------+
| information_schema |
| mysql |
| performance_schema |
| sys |
+--------------------+
4 rows in set (0.01 sec)
mysql> create database test;
Query OK, 1 row affected (0.03 sec)
mysql> show databases;
+--------------------+
| Database |
+--------------------+
| information_schema |
| mysql |
| performance_schema |
| sys |
| test |
+--------------------+
5 rows in set (0.00 sec)
mysql>
查看node002上的數(shù)據(jù)庫,已經(jīng)與node001同步:
mysql> show databases;
+--------------------+
| Database |
+--------------------+
| information_schema |
| mysql |
| performance_schema |
| sys |
| test |
+--------------------+
5 rows in set (0.00 sec)
mysql>
在node002上刪除test數(shù)據(jù)庫:
mysql> drop database test;
Query OK, 0 rows affected (0.02 sec)
mysql>
在node001上查看數(shù)據(jù)庫,已經(jīng)與node002同步:
mysql> show databases;
+--------------------+
| Database |
+--------------------+
| information_schema |
| mysql |
| performance_schema |
| sys |
+--------------------+
4 rows in set (0.00 sec)
mysql>
在node002上增加一個數(shù)據(jù)庫test002:
mysql> show databases;
+--------------------+
| Database |
+--------------------+
| information_schema |
| mysql |
| performance_schema |
| sys |
+--------------------+
4 rows in set (0.00 sec)
mysql> create database test002;
Query OK, 1 row affected (0.04 sec)
mysql> show databases;
+--------------------+
| Database |
+--------------------+
| information_schema |
| mysql |
| performance_schema |
| sys |
| test002 |
+--------------------+
5 rows in set (0.01 sec)
mysql>
查看node001上的數(shù)據(jù)庫,已經(jīng)與node002同步:
mysql> show databases;
+--------------------+
| Database |
+--------------------+
| information_schema |
| mysql |
| performance_schema |
| sys |
| test002 |
+--------------------+
5 rows in set (0.00 sec)
mysql>
原文來源:https://mp.weixin.qq.com/s/DgplLEGFfcoAWharuZA86Q
來源:本文內容搜集或轉自各大網(wǎng)絡平臺,并已注明來源、出處,如果轉載侵犯您的版權或非授權發(fā)布,請聯(lián)系小編,我們會及時審核處理。
聲明:江蘇教育黃頁對文中觀點保持中立,對所包含內容的準確性、可靠性或者完整性不提供任何明示或暗示的保證,不對文章觀點負責,僅作分享之用,文章版權及插圖屬于原作者。


聯(lián)系郵箱:service#改成@jsedu114.com
地 址:中國●江蘇
南京市秦淮區(qū)洪武路359號1506室
Copyright©2013-2025 ?JSedu114 All Rights Reserved. 江蘇教育信息綜合發(fā)布查詢平臺保留所有權利
![]() 蘇公網(wǎng)安備32010402000125
蘇ICP備14051488號-3技術支持:南京博盛藍睿網(wǎng)絡科技有限公司
蘇公網(wǎng)安備32010402000125
蘇ICP備14051488號-3技術支持:南京博盛藍睿網(wǎng)絡科技有限公司


 新浪微博
新浪微博